One of the iconic stations for the PE/SP is available as a kit in HO scale. Here is a drawing of the front of it. Bruce Petty has one build and I have been able to shoot a few beauty shots of my engines in front of it. Showcase Miniatures PE/SP Depot Link makes the model and while it is big by most HO standards, it can make quite a nice dio that makes great use of available space.
While not located anywhere near the Orphan Spur, it is a must to add to my shelf of unrelated structures.
Station on Bruce Petty Layout
Monday, October 26, 2015
Critter Decorated
Tuesday, September 1, 2015
PE 1647 Near Reality.
Good News! Modeling a short spur of a larger railroad is generally not much of a problem. Common equipment may have flowed on and off the line depending on need. On the Orphan Spur two switchers were used, the 44-Tonner which can be modeled using the new Bachmann model in both HO or N scale, and the Plymouth 35 ton switcher that has been difficult to model. In N scale we have the old Bachmann Plymouth but has the bulky look and can be modified for the part. In HO the same model was available, but given the size, a real stretch to make into an acceptable version. I attended the latest National Train show and got to see up front the new Broadway Limited Plymouth 35 ton switcher and it is very close to the elusive PE 1647 that was used on the spur during the time I am modeling. Here's a shot of the model.
The are producing it in just about very scheme possible save PE of course! No problem. Micro Scale Decal sheet 87-590 has all the bits and pieces you need to model the engine.
Here are a few shots of 1647 in action on the turn I am modeling.
You can see some of the differences, but given the proto and my unwillingness to spend a lot of time counting rivets, this will work out just fine. It has the wheel set and the look for a good enough sample of the real thing. So far I haven't found shots of the rear end of the engine, hoping it has the broad window glass of the proto. Edit, here is a shot of the rear of the model...not as open as the proto...I may need to address this.
The are producing it in just about very scheme possible save PE of course! No problem. Micro Scale Decal sheet 87-590 has all the bits and pieces you need to model the engine.
Here are a few shots of 1647 in action on the turn I am modeling.
You can see some of the differences, but given the proto and my unwillingness to spend a lot of time counting rivets, this will work out just fine. It has the wheel set and the look for a good enough sample of the real thing. So far I haven't found shots of the rear end of the engine, hoping it has the broad window glass of the proto. Edit, here is a shot of the rear of the model...not as open as the proto...I may need to address this.
Friday, May 29, 2015
Reference
Back at it this weekend thinking about adopting a simplified shelf layout. I've been tapping at different module designs and the like and the last corner module seems to be working for me, at least for a photo prop. I'm looking at building a base with a simple backdrop with lights attached for shooting rolling stock and engines as they get finished. In doing research I went to the trusty 1953 ORER and scanned the Pacific Electric page as a reference. Using this I was able to go through my rolling stock and pull out the stuff I have no use for and will sell to fund a few more appropriate purchases. Bruce Petty of the famed Burbank Branch Layout donated a half model of the packing house at the end of the Orphan Branch Turn just off the Brand Avenue interchange. I think this is the motivation I need to keep moving forward.
Attached is the ORER page for reference.
Friday, April 10, 2015
Moving the Ponies
I've been away taking care of side projects and also taking time to think about the next module. In some ways the corner piece sorta blocked me in a bit having wanted to have something more there. I have been working on a few sketches that will give me a bit more room. Adding 6" to the short side will push the layout a bit from the wall and give me another parallel track for livestock loading. I didn't want any more behind the orange grove, so this seems the best solution. I've ordered a few ATSF style Cattle Cars and began cutting parts for a portable loading ramp. With the weather closing in a bit this weekend, I want to push forward with another project:
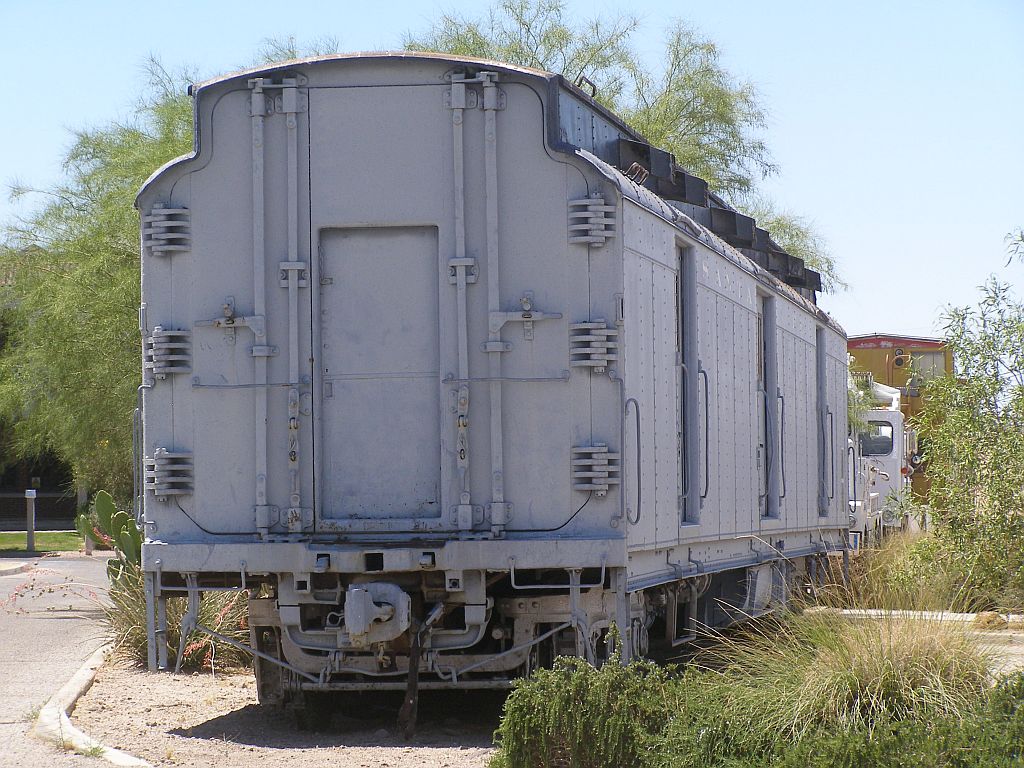
I scored a bunch of old Athearn Baggage cars and now have enough plastic to do some cutting and stitching. Lots of history with these cars and given the era I model, these were most likely used to transport cars or freight. Regardless it ought to be an interesting car to add to my slowly growing Head End collection.
Sorry for the huge image :)
Good info on line and in the Santa Fe Head End Car book with drawings of the Pullman Standard model
Friday, January 16, 2015
Working with a little SOCAL Veggies.
Two Iconic plants make Southern California look like Southern California. Palms and Eucalyptus trees. The former somewhat native and used as an ornamental and the latter, planted by the Bizzillions by Southern Pacific and Santa Fe. Getting Eucalyptus trees looking like Eucalyptus trees has still eluded me, but there are a few ready made examples that could fill in if you need one or two...given the price. Auscision Models has a line of trees, most of which will work for SOCAL. There are shots on line of some of their Gum trees that look good with a little work. They also carry both the Washingtonian Palms and the Date Palms, both must needs for any layout.
I prefer to make my own foliage and given the modelers out there who are giving of their techniques, makes it easy to replicate what you need effectively following their lead. Palms, need tons of them and I would rather spend the money on new resin Reefers than trees. Here are some samples I worked up with the help of John Signor who provided some initial artwork for trees he wanted me to cut for him. Essentially I took a wood dowel, spun it on a drill and got the right shape using a rasp. The crisscross pattern you see on most palms was made by slanting the cut of the teeth on the rasp in one direction, reversing the direction on the drill to get the cross pattern cut across the first cut. I made a silicone mold that had a knot on the top to hold a small lump of Sculpy clay that's shaped like a ball. I then spread some thick superglue on the upper trunk and added course ballast for texture. The fronds were laser cut and then pulled across a dowel to get the droop effect. I then shot the trunk with yellowish brown paint, let set and then got to work plugging in fronds. These are laser cut from a thin laser board, but a good card stock will work just as well. I gave the clay a shot of super glue accelerator, dipped the ends of the fronds in a puddle of thick super glue and then pushed them into the clay. About 60 fronds later you have a tree.
I made up a bunch of trunks and fronds in advance and it took about 20 minutes to finish a tree.
I'll list the colors I used next installment.
Here you can see them stuck on the module. A few more and things will start to fill out nicely.
Subscribe to:
Posts (Atom)